
Congratulations! You’ve built an application, and now you are ready to share it with the world. This is a monumental step for any developer. The journey from localhost to a live URL is full of learning, but it doesn’t have to be overwhelming.
For your first deployment, DigitalOcean is often the perfect destination. Renowned for its simplicity, developer-friendly interface, and transparent pricing, DigitalOcean streamlines the complex world of cloud infrastructure.
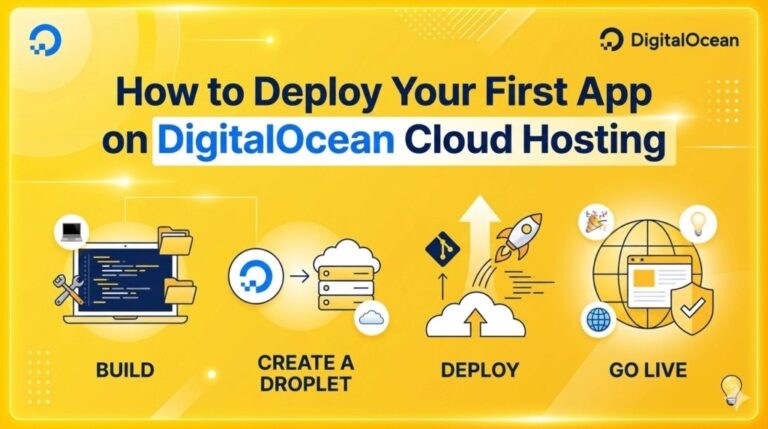
In this comprehensive, 1500-word guide, we will walk you through the entire process, step-by-step. We will cover two main deployment methods: the ultra-simple DigitalOcean App Platform (PaaS) and the flexible, foundational DigitalOcean Droplets (IaaS). By the end of this article, you will have a live application and a foundational understanding of modern cloud deployment.
Why Choose DigitalOcean for Your First App? 🌊
Before we dive into the ‘how’, let’s talk about the ‘why’. The cloud hosting landscape is vast (AWS, Azure, Google Cloud). Why start here?
-
Simplicity: DigitalOcean’s dashboard is designed by developers, for developers. It’s intuitive, clean, and avoids the overwhelming jargon often found in larger providers.
-
Predictable Pricing: You know exactly what you will pay. Their “Droplet” model starts at $4/month, and the App Platform offers a free tier for static sites.
-
App Platform (PaaS): For your first app, this is a game-changer. It handles the server management, OS updates, and scaling for you, allowing you to focus purely on your code.
-
Exceptional Documentation: Their community tutorials are legendary, covering almost every stack imaginable.
Phase 1: Preparation – Setting the Stage 🛠️
You cannot deploy what you haven’t prepared. Before touching DigitalOcean, we need to ensure your application is ready for the cloud.
1. Version Control with Git
Your code must reside in a Git repository. DigitalOcean’s App Platform integrates directly with GitHub and GitLab. If your code is only on your laptop, now is the time to create a repository.
-
Initialize Git:
git init -
Commit your changes:
git add . && git commit -m "Ready for deployment" -
Push to GitHub/GitLab: Create a new repository and push your code.
2. The Deployment Checklist (The “Standard” Requirements)
Every cloud app requires a few configuration standardizations:
-
Environment Variables: Never, ever hardcode API keys, database passwords, or secrets in your code. Move them to a
.envfile for local development. For production, we will input these directly into DigitalOcean. -
Listen on the Correct Port: Your application should not be hardcoded to listen on port 3000 or 8080. It must bind to the port provided by the environment. In Node.js, this is
process.env.PORT || 8080. -
Production Dependencies: Ensure your
package.json(for Node),requirements.txt(for Python), orGemfile(for Ruby) accurately lists all dependencies required for the app to run in production.
Phase 2: Deployment Method 1 – The Easy Way (App Platform) 🚀
This is the recommended method for 90% of first-time deployments. The DigitalOcean App Platform is a Platform as a Service (PaaS). You provide the code; they provide the infrastructure.
The App Platform Workflow:
-
Log in to DigitalOcean: If you don’t have an account, sign up.
-
Create an App: Click the “Create” button in the top right corner and select “Apps”.
-
Connect to Your Repository:
-
Choose GitHub or GitLab as your source.
-
Authenticate your account.
-
Select the specific repository and the branch (e.g.,
mainormaster) you want to deploy. -
Tip: Check the “Autodeploy on Push” box. This means every time you push code to that branch, DigitalOcean automatically rebuilds and redeploys your app.
-
-
Configure Your App: DigitalOcean is smart. It will scan your repo and attempt to detect your stack (e.g., “Node.js Web Service”).
-
Resource Type: Ensure it correctly identifies your app as a “Web Service” (it accepts HTTP traffic) or a “Static Site” (HTML/CSS/JS only).
-
Build & Run Commands: Usually, the auto-detected commands are correct (e.g.,
npm install && npm run buildfor build,npm startfor run). If your framework is unique, you may need to adjust these. -
Environment Variables: Click “Edit” next to Environment Variables. This is where you securely add the keys you removed in Phase 1 (e.g.,
DATABASE_URL,API_KEY).
-
-
Choose a Plan: For many small apps, the “Basic” tier is excellent ($5/month). If you are deploying a simple HTML/CSS frontend, the “Starter” tier is free.
-
Finalize and Deploy: Review the summary and click “Create Resources”.
What Happens Next?
DigitalOcean will start the Build Phase. It creates a secure container, installs your dependencies, builds your assets, and then starts your server. You can watch the logs live. Within a few minutes, you will be provided with a unique public URL (e.g., your-app-name-w4z9x.ondigitalocean.app). Your app is live! 🎉
Phase 3: Deployment Method 2 – The Flexible Way (Droplets) 🔧
Sometimes, you need full control. You might need to install specific system-level software, manage your own firewall, or run multiple processes that PaaS platforms struggle with. In this case, you use Infrastructure as a Service (IaaS). In DigitalOcean, this means a Droplet (a virtual private server).
Deployment on a Droplet is more complex because you are the system administrator. We will deploy a standard Node.js application on an Ubuntu 22.04 Droplet.
1. Create the Droplet
-
Click “Create” and select “Droplets”.
-
Choose an Image: Select Ubuntu 22.04 LTS.
-
Choose a Plan: The $4 or $6/month “Shared CPU” plan is perfect for learning.
-
Choose a Datacenter Region: Select a location closest to you or your expected audience.
-
Authentication: Highly recommend using SSH Keys. This is much more secure than a password. If you haven’t generated one, DigitalOcean has an excellent guide in the creation flow.
-
Finalize: Name your Droplet (e.g.,
production-app-server) and click “Create Droplet”.
2. Connect via SSH
Once the Droplet is running, you will be given an IP address (e.g., 203.0.113.10). Open your terminal:
# Connect as the root user using your SSH key
ssh root@203.0.113.10
Welcome to your new server.
3. Server Setup (The Initial Configuration)
You must now secure your server and install the necessary tools.
# Update the package list
apt update

# Upgrade installed packages
apt upgrade -y

# Install tools we will need
apt install -y git curl ufw

# (Optional but Recommended) Create a non-root user for security
adduser deployuser
usermod -aG sudo deployuser
# Now, switch to that user for the remaining steps:
su - deployuser
4. Install Your Application Runtime
Since this is a Node.js app, we need Node and npm. Using Node Version Manager (NVM) is the best approach.
# Install NVM
curl -o- https://raw.githubusercontent.com/nvm-sh/nvm/v0.39.7/install.sh | bash
source ~/.bashrc

# Install the latest Long Term Support (LTS) version of Node
nvm install --lts
nvm use --lts
5. Clone and Configure Your App
Now, we bring your code onto the server.
# Navigate to the home directory
cd ~

# Clone your repository
git clone https://github.com/yourusername/your-repo-name.git my-app

# Enter the directory and install dependencies
cd my-app
npm install
6. Managing the Process (PM2)
If you start your app with npm start, it will die the moment you disconnect your SSH session. We need a process manager to keep it running forever. We use PM2.
Bash
# Install PM2 globally
npm install -g pm2

# Start your application (assuming 'npm start' is the start command)
pm2 start npm --name "my-awesome-app" -- start

# Configure PM2 to restart automatically if the server reboots
pm2 startup
# (Copy and paste the command generated by the setup output)
pm2 save
7. Setting up the Reverse Proxy (Nginx)
Your app is currently running (likely) on localhost:8080. We cannot access that from the internet. We need a reverse proxy to accept requests on port 80 (HTTP) and forward them to port 8080. We use Nginx.
# Install Nginx
sudo apt install -y nginx

# Start Nginx
sudo systemctl start nginx
Now we must configure Nginx. We will edit the default configuration file:
sudo nano /etc/nginx/sites-available/default
Delete everything and paste the following:
Nginx
server {
    listen 80;
    listen [::]:80;

    server_name 203.0.113.10; # Replace with your Droplet IP or your Domain

    location / {
        proxy_pass http://localhost:8080; # Replace with your app's port
        proxy_http_version 1.1;
        proxy_set_header Upgrade $http_upgrade;
        proxy_set_header Connection 'upgrade';
        proxy_set_header Host $host;
        proxy_cache_bypass $http_upgrade;
    }
}
Save and exit Nano (Ctrl+O, Enter, Ctrl+X).
Test the configuration and restart Nginx:
sudo nginx -t
sudo systemctl restart nginx
8. Final Step: Configure the Firewall
Secure your Droplet by only allowing necessary traffic.
# Allow SSH connections (Critical!)
sudo ufw allow OpenSSH

# Allow HTTP and HTTPS traffic
sudo ufw allow 'Nginx Full'

# Enable the firewall
sudo ufw enable
Visit your Droplet’s IP address (http://203.0.113.10). Your app is now live via Droplet deployment! 🥳
Phase 4: Beyond Deployment – Essential Next Steps 🏆
Regardless of the method used, a deployed app needs professional finishing touches.
1. Connect a Custom Domain
No one wants to visit http://203.0.113.10 or a messy .ondigitalocean.app URL. Buy a domain name from a registrar (e.g., Namecheap, GoDaddy).
-
App Platform: In the “Settings” tab of your app, under “Domains”, you can add your custom domain. DigitalOcean provides the CNAME record you need to update at your registrar.
-
Droplets: In the DigitalOcean Networking dashboard, add your domain. You must point your domain’s Nameservers to DigitalOcean (
ns1.digitalocean.com,ns2...,ns3...). You then create an “A” record pointingyourdomain.comto your Droplet IP.
2. Secure Your Domain with SSL (HTTPS) 🛡️
HTTPS is mandatory in 2024. It secures user data and improves SEO.
-
App Platform: This is automatic. DigitalOcean manages the SSL certificate for your custom domain for free. You don’t need to lift a finger.
-
Droplets: We use Certbot by Let’s Encrypt. Connect via SSH and run:
sudo apt install certbot python3-certbot-nginx
sudo certbot --nginx -d yourdomain.com -d www.yourdomain.com
Certbot will automatically update your Nginx configuration, provision a certificate, and set up automatic renewal.
3. Monitoring Your App
-
App Platform: DigitalOcean provides basic CPU and memory metrics. You can also integrate with external monitoring services if needed.
-
Droplets: You are responsible for monitoring. You can install tools like Netdata, or use DigitalOcean’s built-in Agent for improved metrics in the dashboard.
The Verdict: App Platform vs. Droplets 🤔
| Feature | DigitalOcean App Platform (PaaS) | DigitalOcean Droplets (IaaS) |
| Complexity | Very Low. Great for beginners. | High. Requires sysadmin skills. |
| Setup Time | < 10 Minutes | > 30 Minutes |
| Management | Managed by DigitalOcean (OS, Security) | Managed by YOU (OS, Security, Updates) |
| Scaling | One click (vertical or horizontal) | Manual setup or Scale Sets |
| Cost | Starts Free (Static), $5 (Web Service) | Starts at $4 (Limited), $6 (Standard) |
| Best For | Standard apps (Node, Python, Static) | Specialized apps, full control, legacy apps |
Our Recommendation: For your first app, use the App Platform. It removes 90% of the complexity, allowing you to focus on the joy of seeing your application live. You can always learn Droplets later when you have a specific need for full infrastructure control.